MxCAD APP application integration
We have developed a complete online CAD application according to mxcad development kit, which includes the realization of drawing, editing, text style setting, layer setting, line setting and other functions.
At the same time, we provide a plug-in development interface, users can carry out secondary development on the basis of the interface, so that users can reduce the workload of scratch development, and can quickly integrate a complete CAD project into the project that users need.
We recommend using iframe technology to integrate the functionality of our MxCAD App into the target project.
Click on the download the sample demo source
Note
After downloading and unziving the demo source code, we need to go to the 'Edit\2d' directory, where our target projects are stored, and its structure is as follows:
dist: Front-end resources after MxCAD APP is packaged online
MxCAD: Secondary development project of MxCAD APPP plug-in (users can develop functions on this basis)
MxCADiframe: A sample demo of embedding MxCAD APP via iframe
Run the Demo description
Go to the MxCAD directory and run npm install to install the dependency.
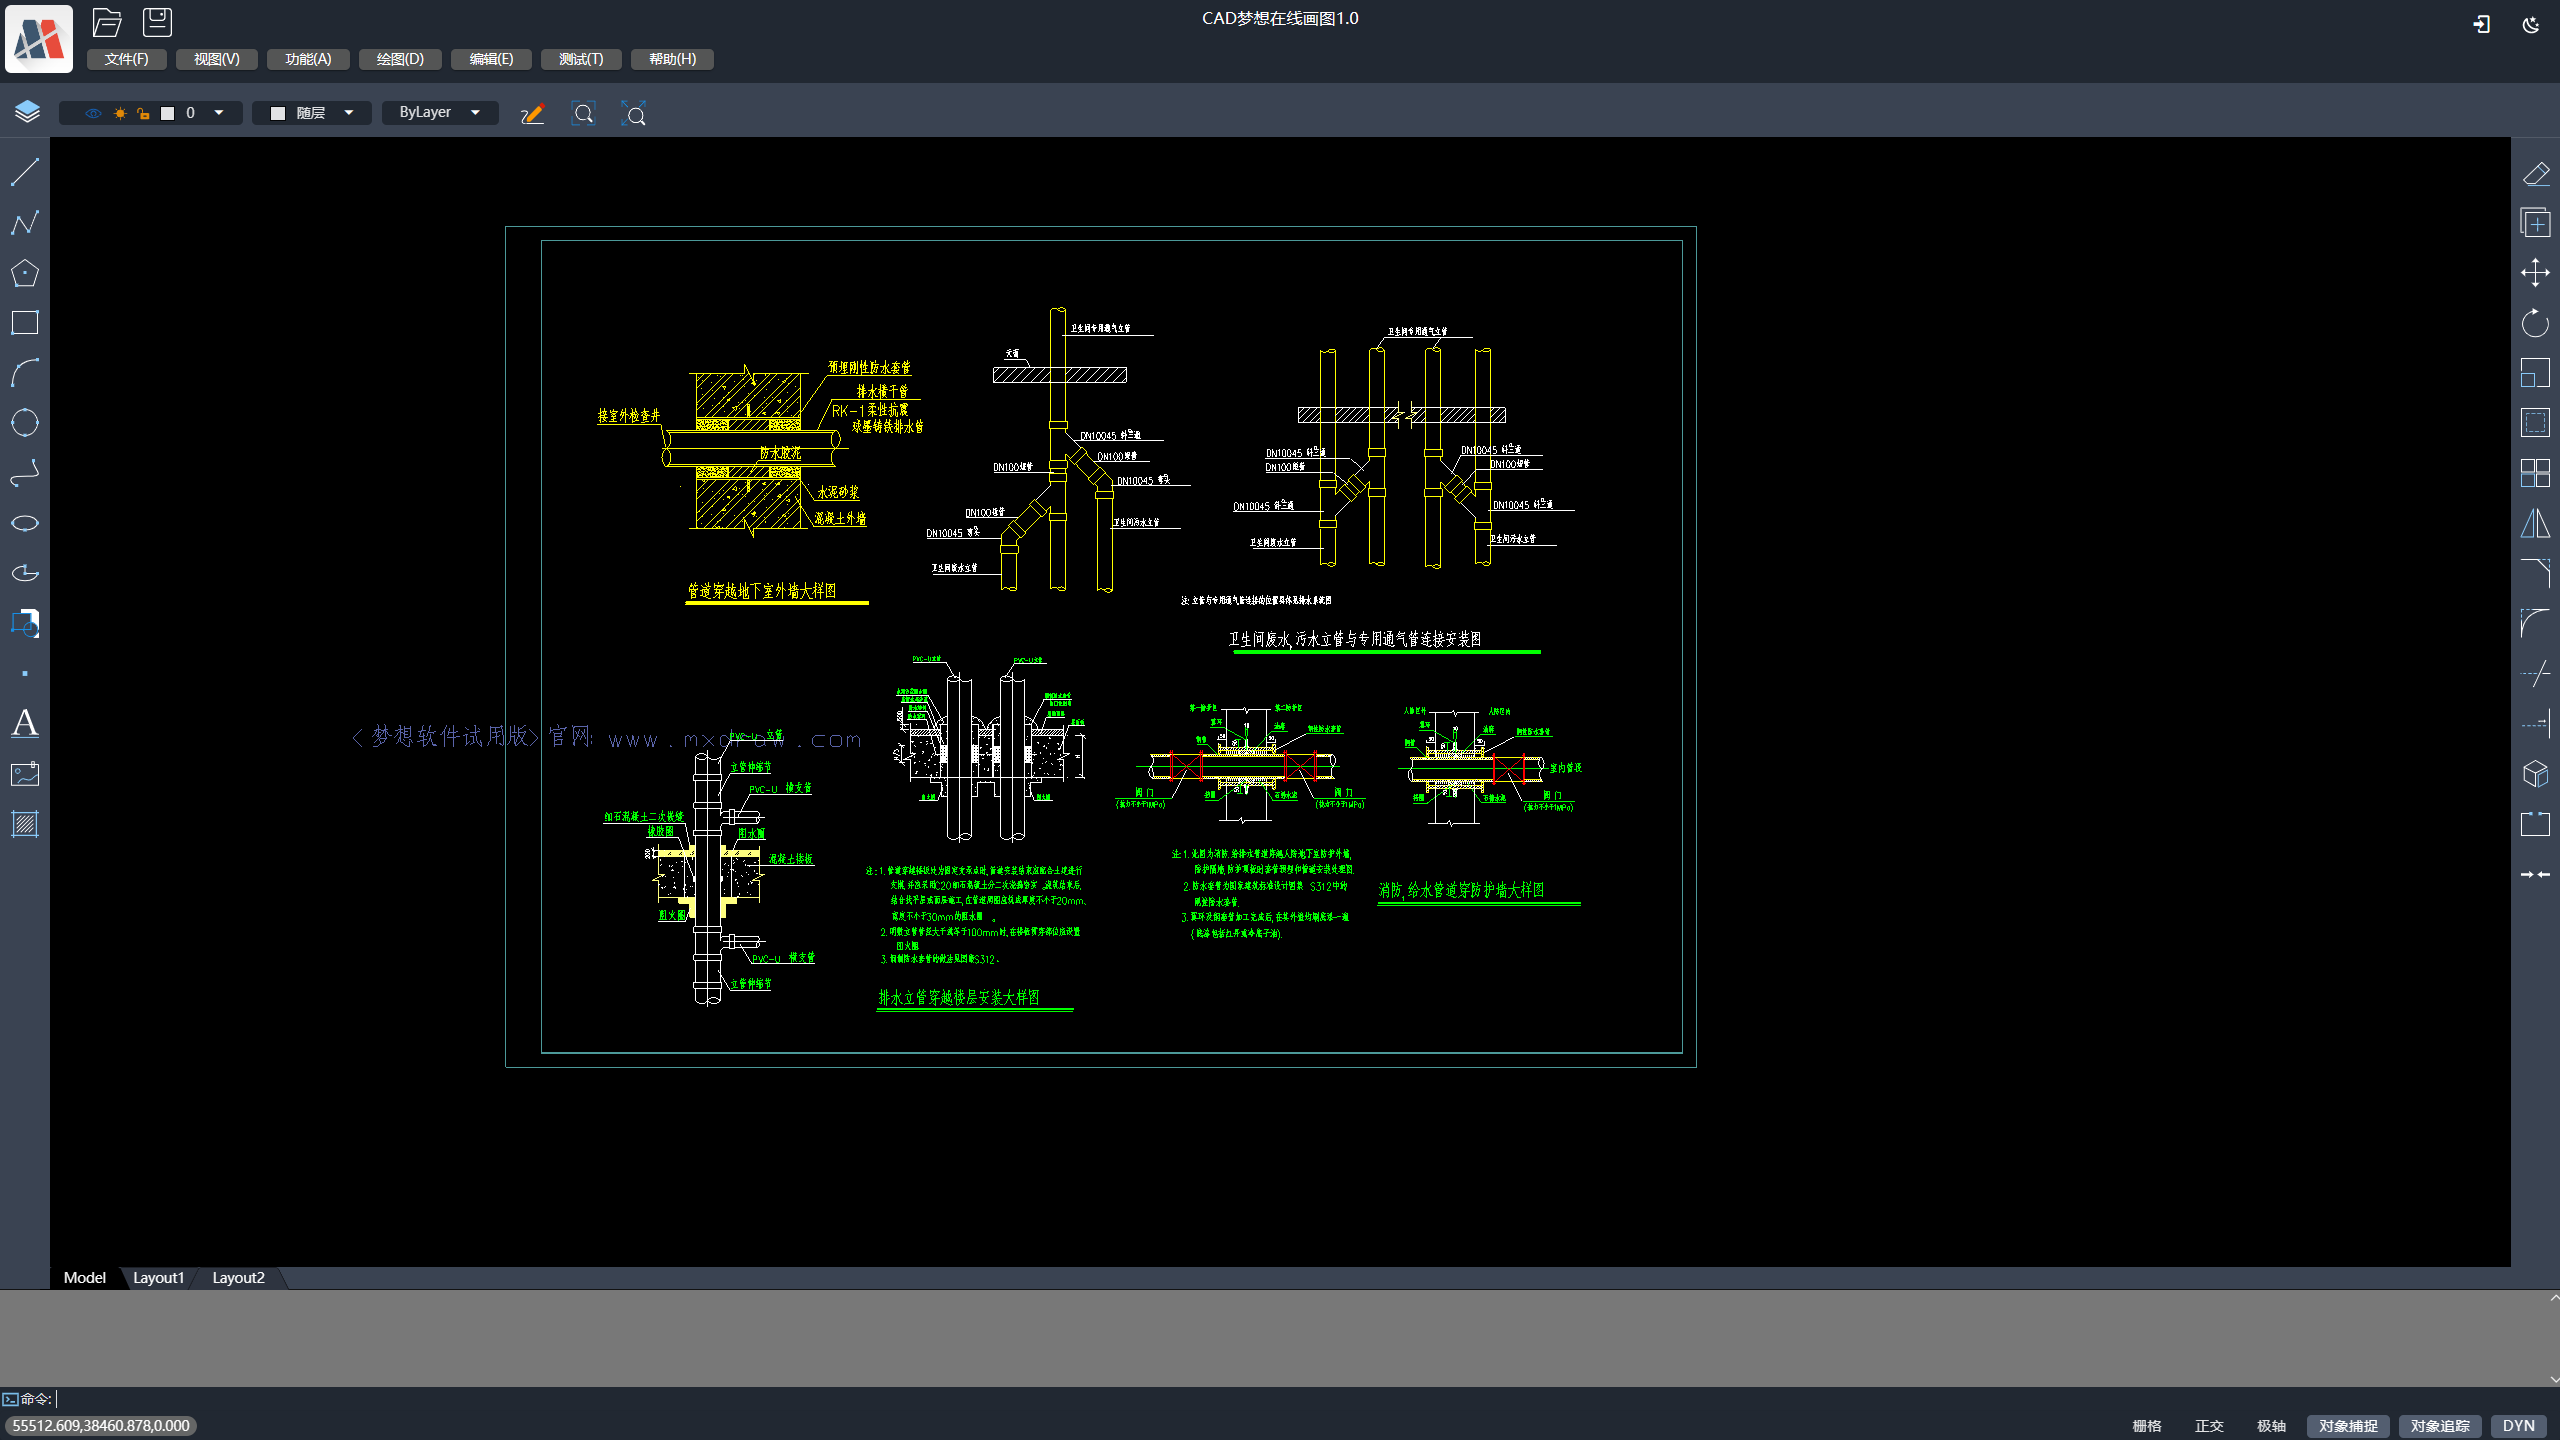
run the 'npm run dev' command to run MxCAD APP online CAD.
After running, visit http://localhost:3366/, and the effect is as follows:
run the 'npm run build' command to package the demo.
Go to the MxCADiframe directory and run npm install to install the dependency.
In its src/components/Home.vue, set the src attribute of iframe to the URL just visited by MxCAD :http://localhost:3366/
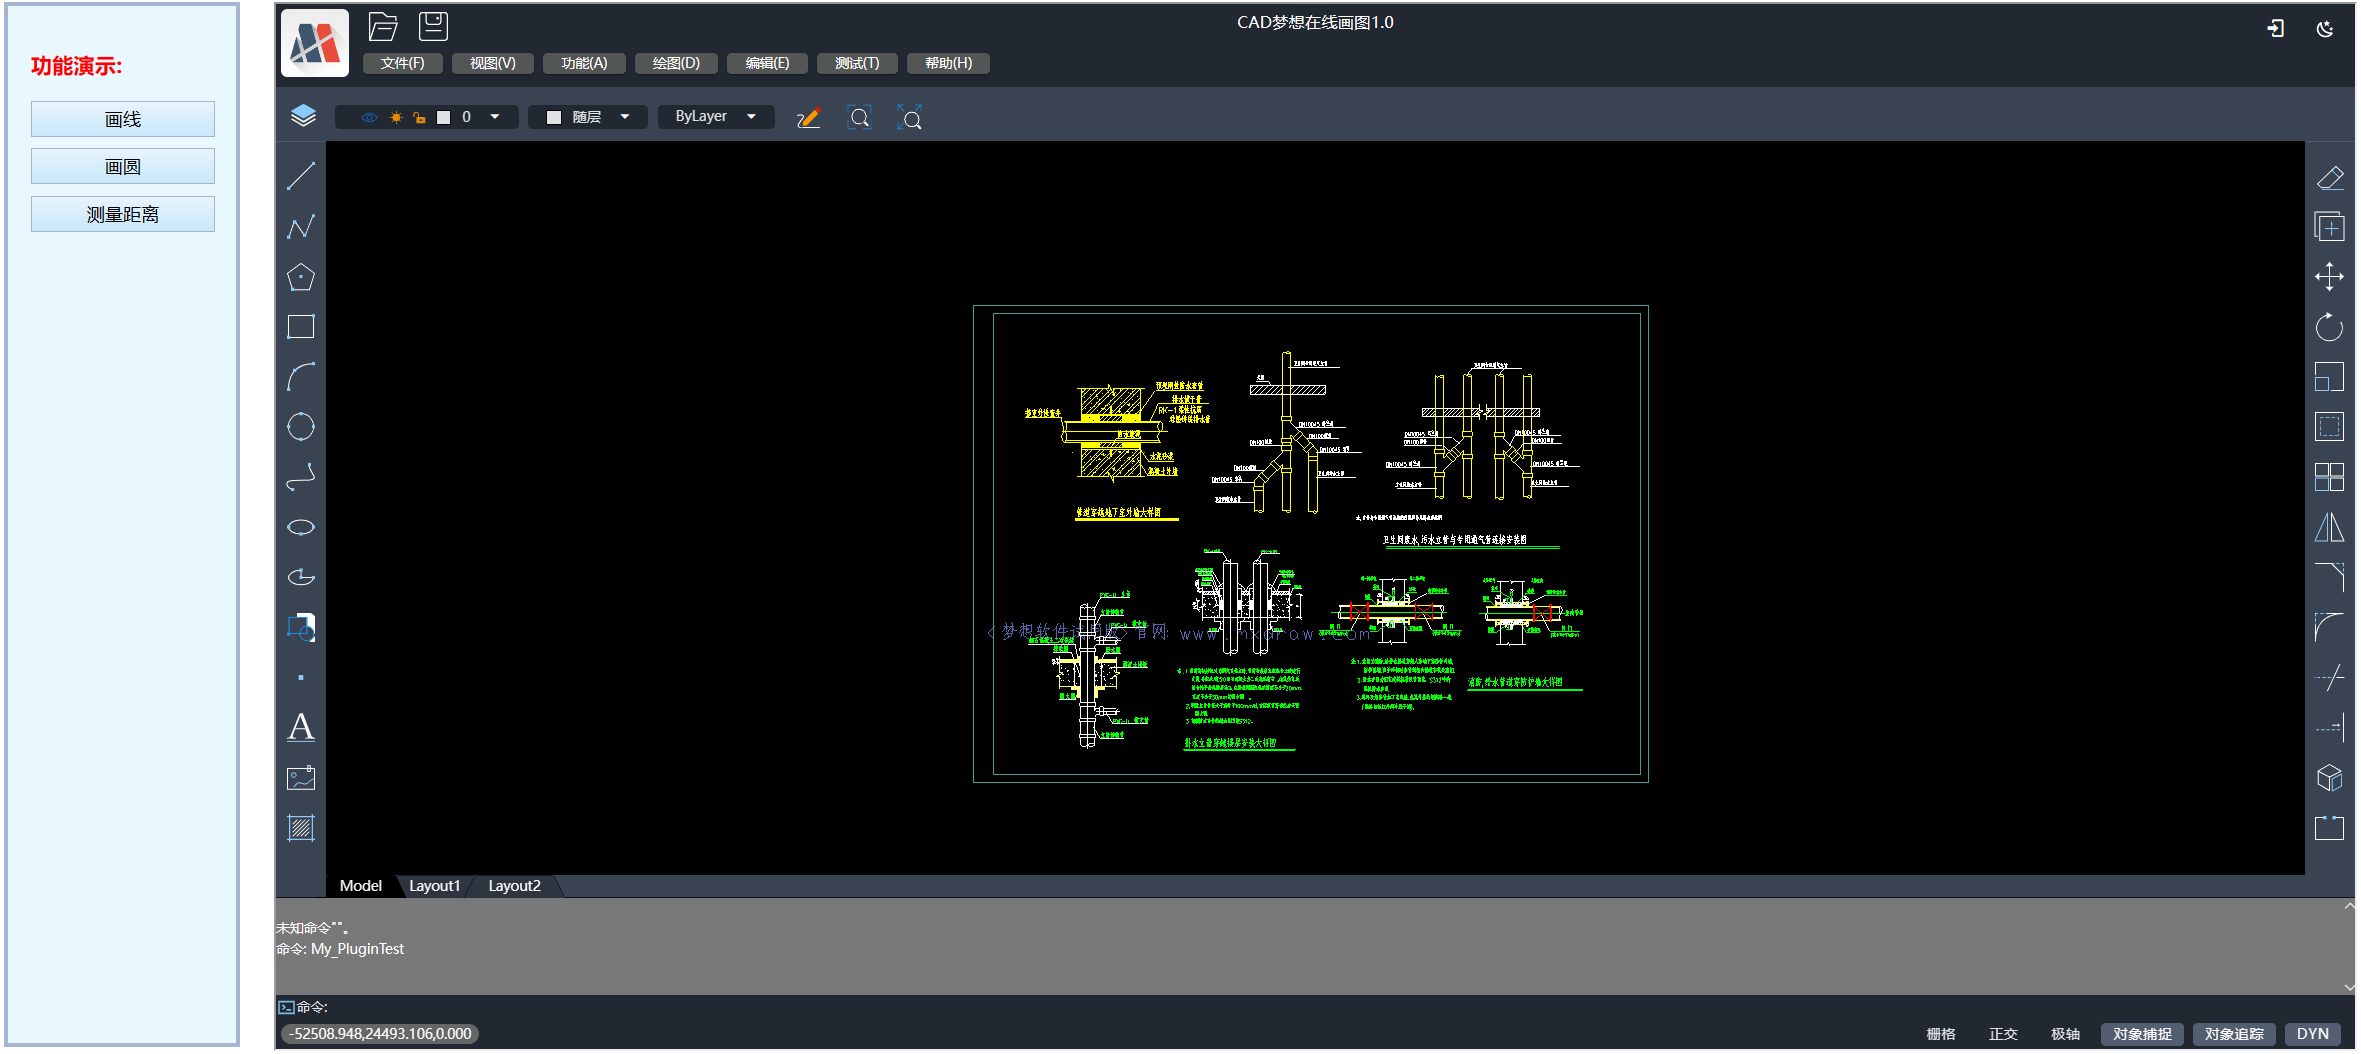
run the debugging MxCADiframe project command: 'npm run serve'.
The effect after operation is as follows:
Note
If you open the MxCADiframe project directly, the drawing cannot be obtained or the iframe message localhost has rejected the connection, because the project in the MxCAD directory has not been started.
Users can refer to the above MxCADiframe project implementation, in their own front-end project with iframe embedded MxCad online editing project.
Tip
MxCAD directory Description:
Based on vite, you can directly run the startup server through npm run dev to browse the page of dist directory, and modify the.ts and.vue files in MxCAD will be automatically compiled and automatically refresh the page.
Based on vite, you need to manually run 'npm run build' to package the dist directory, and after packaging the dist directory is directly placed in dist/plugins.
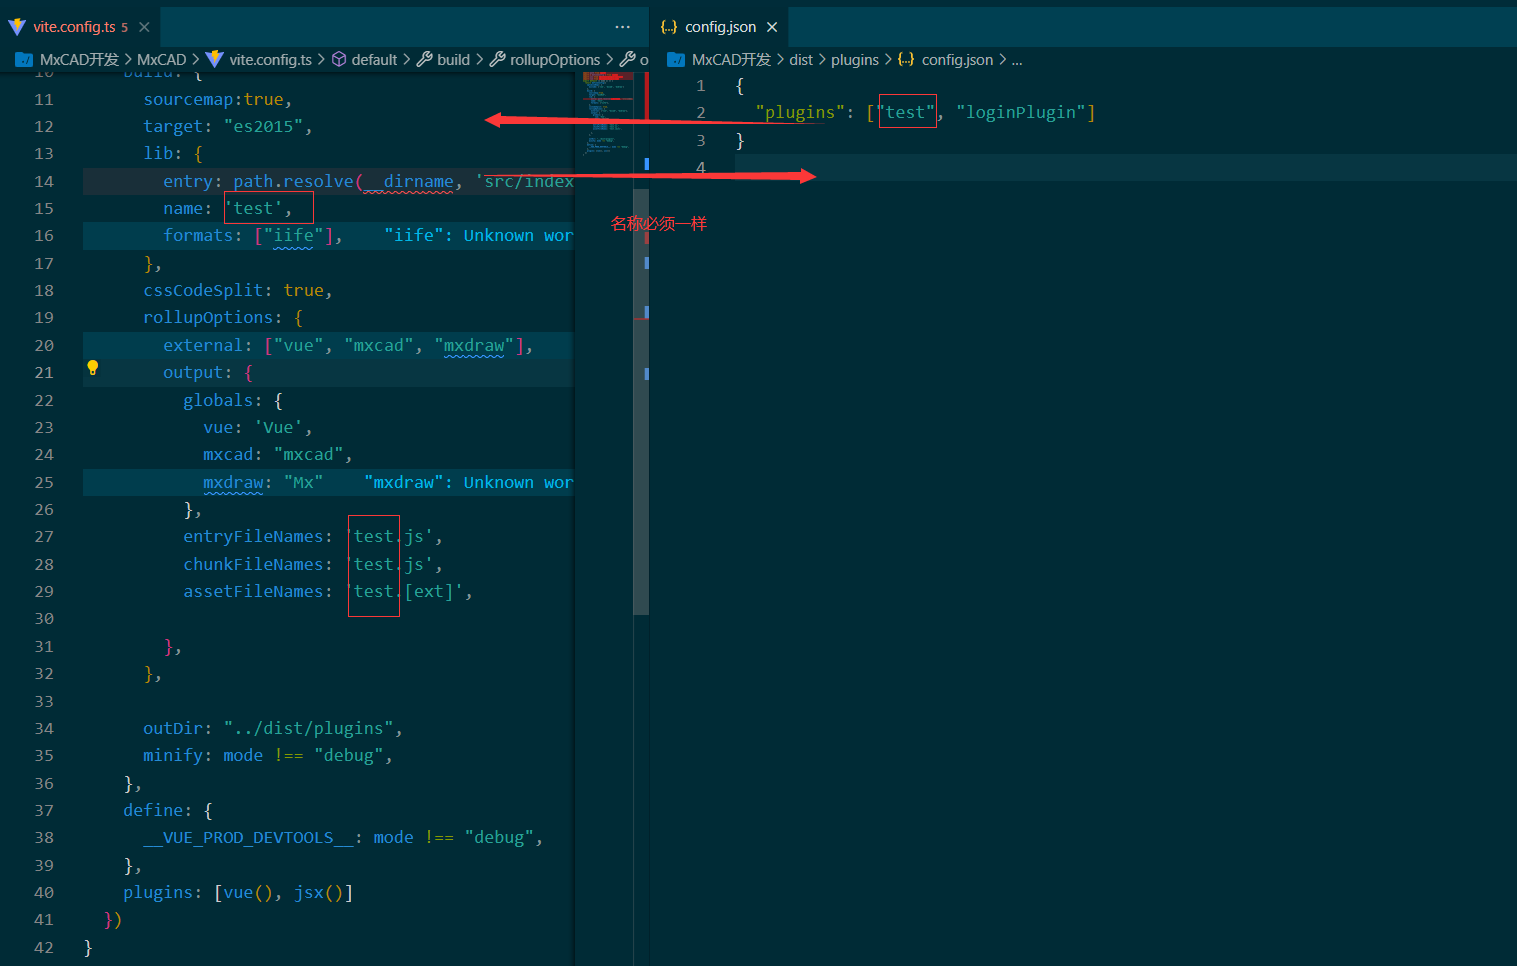
importThe import of mxcad, mxdraw, and vue is actually used in the front-end resources of dist packaging, not a new mxcad, mxdraw, and vue.The configuration of plugins in vite.config.ts and dist/plugins/config.json in the MxCAD directory must correspond.
Description of back-end services
MxCAD APP online CAD when running, will access the following service interface, such as save, open DWG file interface, we need to start MxDraw cloud image development kit in the background service program, So we need to first download MxDraw cloud development kit, Learn how to use the MxDraw Cloud Graphics Development Kit from the Getting Started Documentation (https://help.mxdraw.com/?pid=32).
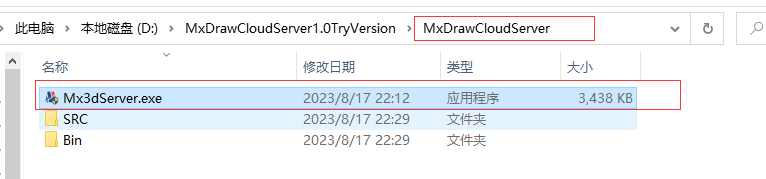
Download the MxDraw cloud image development package and decompress it to the target directory.
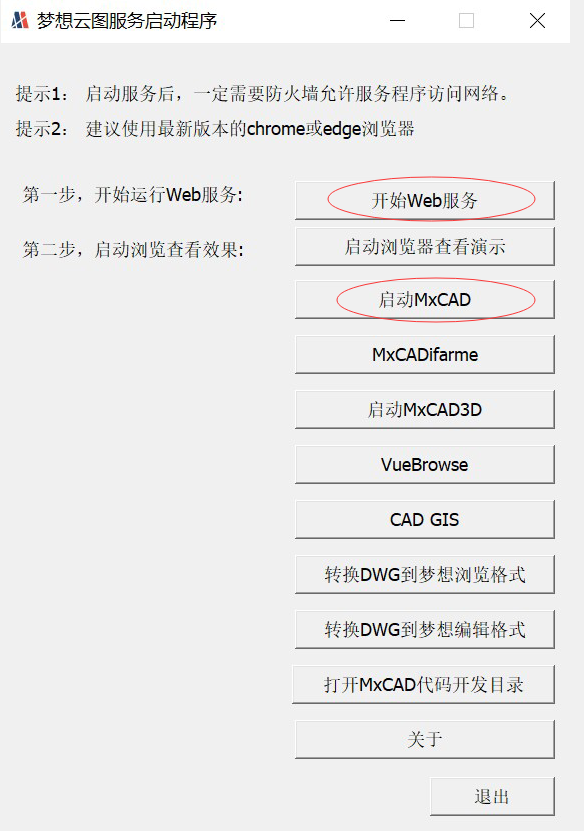
Double-click the Mx3dServer.exe application
Click Start web Service
Tip
To realize the service interface of uploading drawings and saving drawings, you need to read the related documents of MxDraw cloud diagram development kit in detail :https://help.mxdraw.com/?pid=32, and then refer to the corresponding interface source code of MxDraw cloud diagram development kit to implement it according to your own needs. Or directly reuse MxDraw cloud image development kit to provide a good interface.
MxCAD APP online CAD preparation instructions
dist directory of online CAD is the front-end resource after packaging. We can prepare MxCAD APP by modifying the configuration file in this directory.
dist directory several important configuration files:
- mxUiConfig.json: UI configuration file. Some configuration attributes are described as follows (See the configuration file for details).
title: browser title

headerTitle: Add
<version>to automatically replace the version number
mTitleButtonBarData: prompt in the array element, cmd represents a command, clicking the button will execute a command

mRightButtonBarData and mLeftButtonBarData: isShow indicates whether it is displayed

mMenuBarData: list Menu list can always be nested in the list to form a multi-level menu
footerRightBtnSwitchData: ["grid", "orthogonal", "pole", "object capture", "tracking", "DYN"] shows that correspond to the name of the button, an empty array will not display

- mxServerConfig.json: service configuration file. Some configuration attributes are described as follows.
uploadFileConfig: is based on the [WebUploader] (http://fex.baidu.com/webuploader/) to realize the file upload, it is part of the configuration parameters, upload the backend interface specifications are as follows:
baseUrl: indicates the same background server address. The following relative interfaces are based on the same server address The default background service source location is in the cloud map development package: windows:
 linux:
saveDwgUrl: Save DWG file service address, how to implement the interface can provide subsequent development kit Default file saving Node service location:

wasmConfig: The configuration here distinguishes which WASM-related file to use, and see the configuration file in dist for details
plugins/config.json: plug-in configuration file. Some of its properties are described as follows.
- plugins: Is the file that stores the name of the plug-in, it will load the script corresponding to the js corresponding name in the current directory in order, such as a plugins/test.js to fill in a test, you can write your own need to extend the function in these js files, you can ask mxcad globally in the window petition, It is not good to write js directly, and the MxCAD directory is used to package the js project and create the corresponding js file in dist/plugins, as shown in the figure:
Tip
The MxCAD and vue introduced in the mxcad project are actually mxcad and vue in the cadDemo, and this js file is a secondary development extension for cadDemo. The MxCADiframe project demonstrates how to integrate cadDemo packaged resources into an iframe.
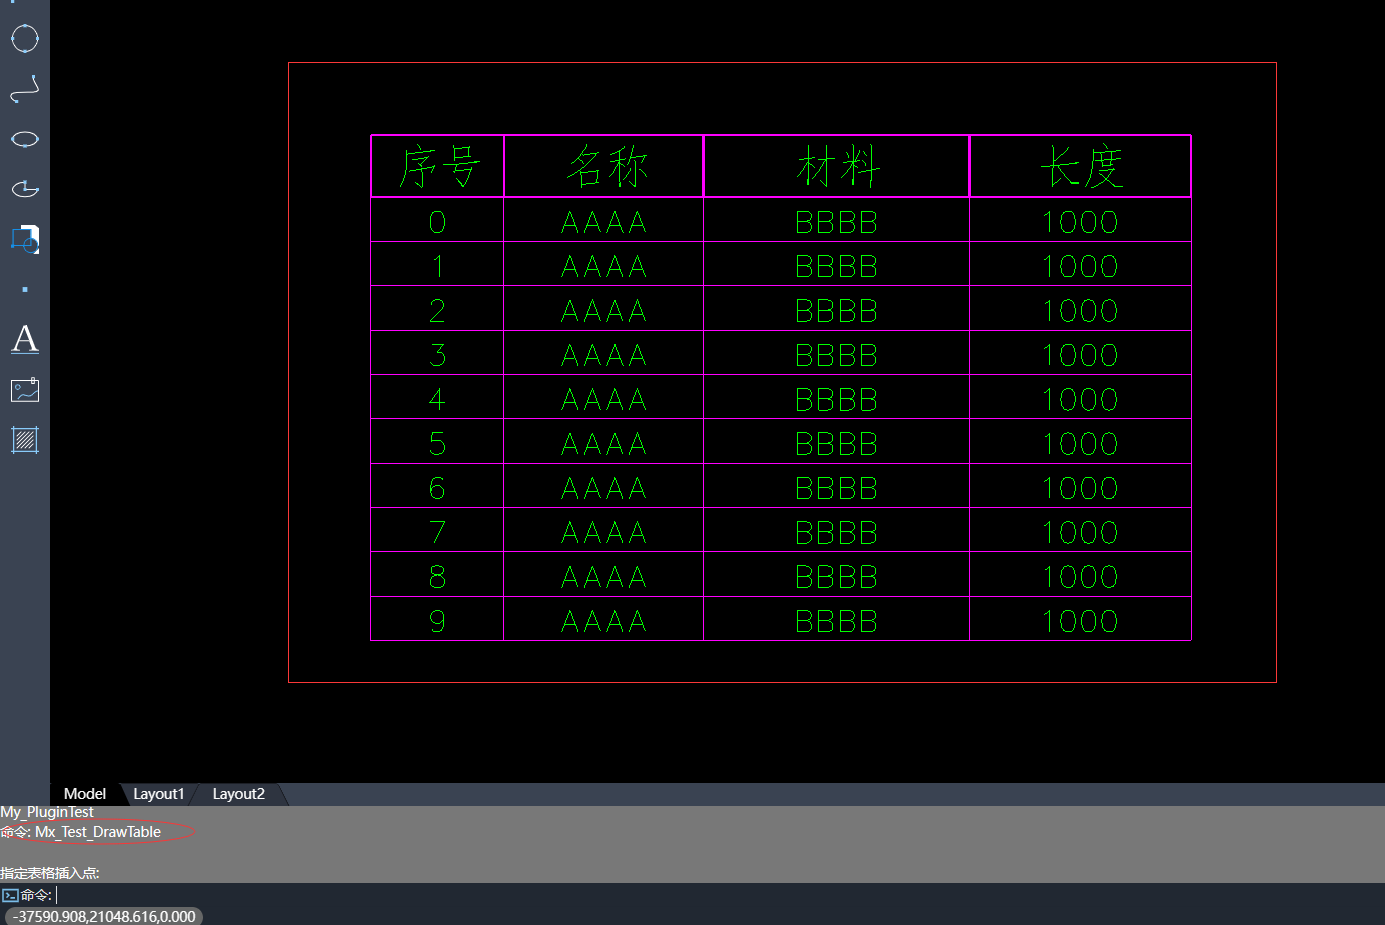
Test Demo use cases
In the src folder under the MxCAD directory, we provide some of the functional test cases implemented through the mxcad library, and users can run these functions from the test button on the page or from the command line.
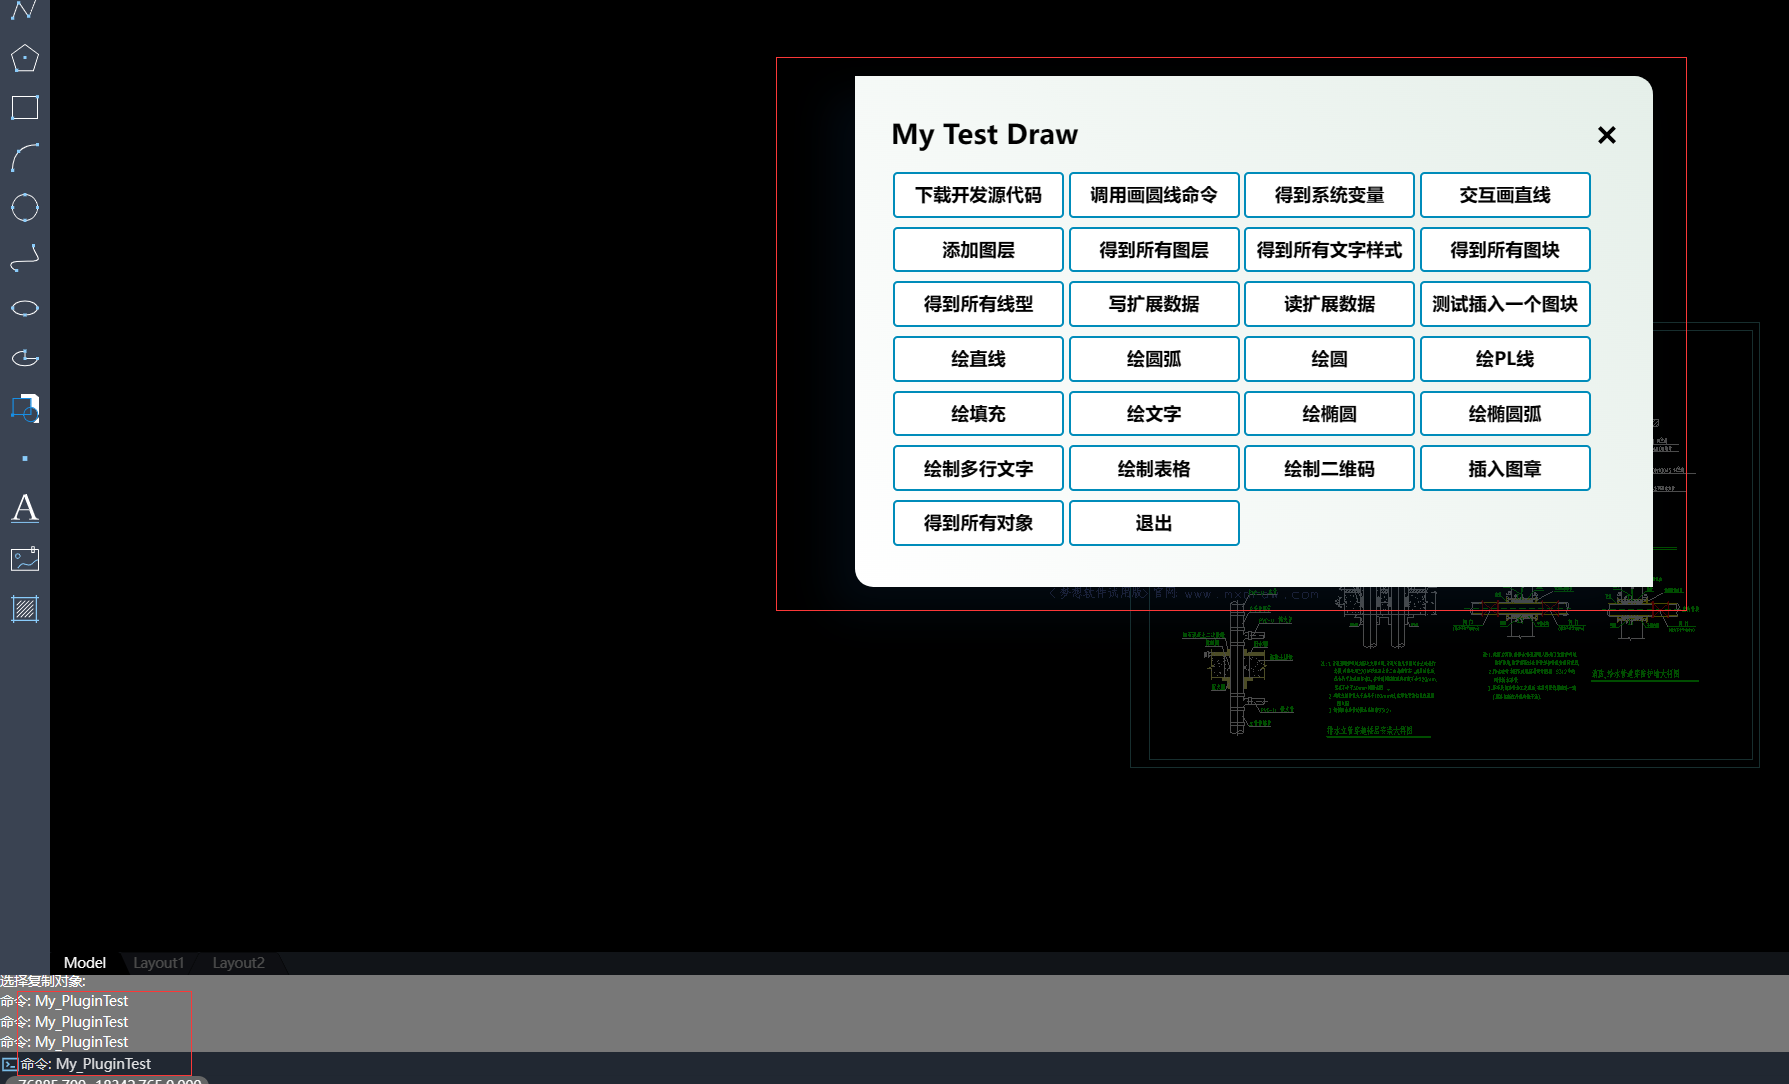
The corresponding code of the function can also be searched in the source code through the command to find the corresponding implementation
Once the plug-in is developed, run 'npm run build' to package it into the dist/plugins directory.
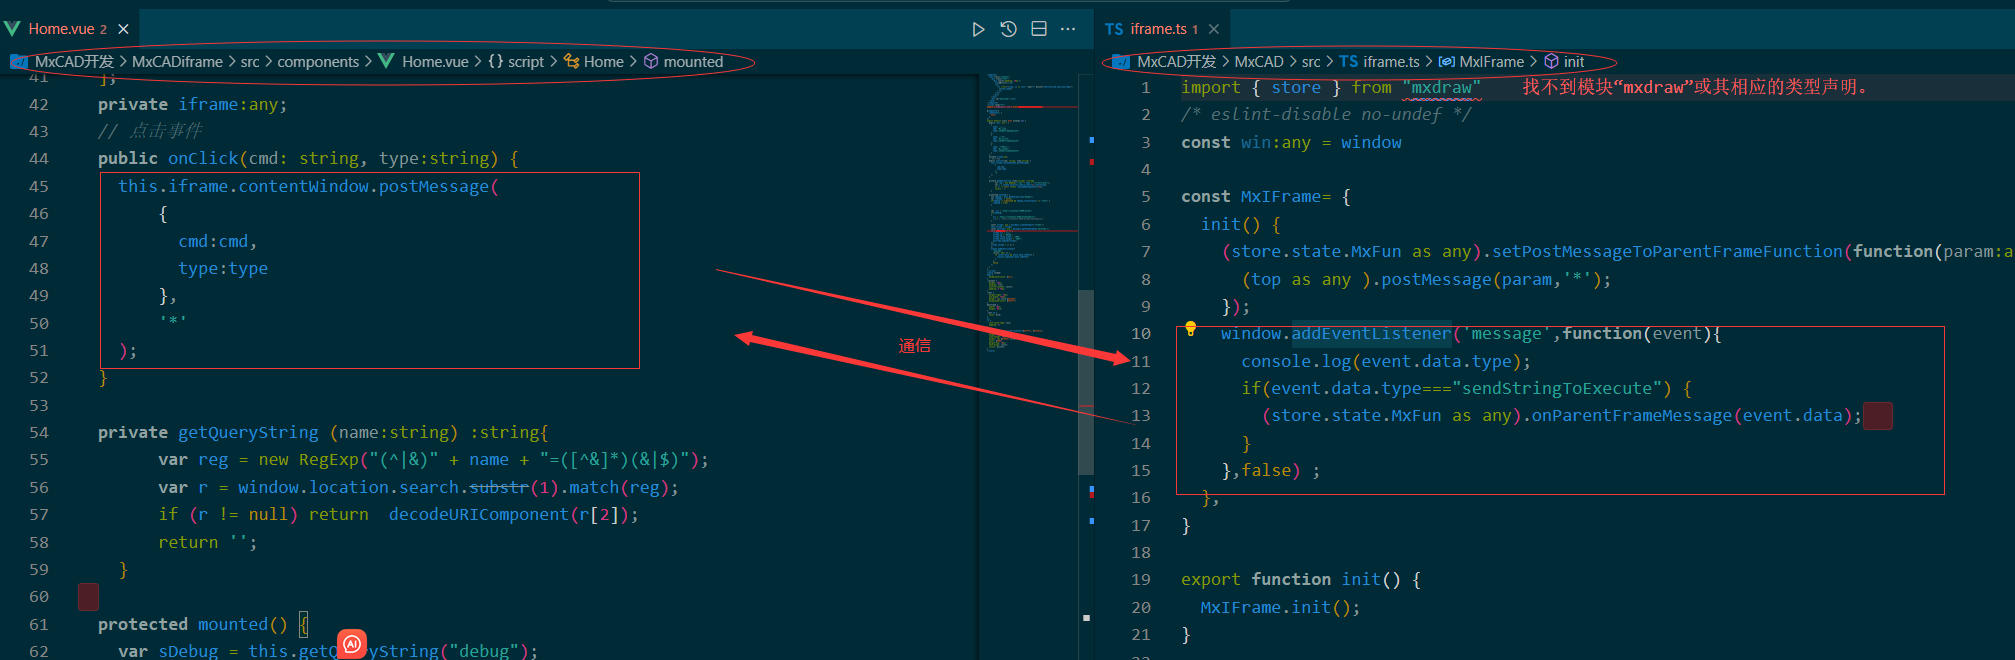
In addition, there is a 'ifame.ts' file in the src directory, which corresponds to postMessage in the MxCADiframe project.